 I choose to do a propaganda poster on World War II. The poster is about people talking, giving away or letting important information slip from their mouths and then the enemies will hear and bad things will occur. I choose lips and the blowing wind was suppose to be the talking then lead the ship to shipwreck against the rocks. I think I spent too much time and should have kept it more simple. I had so many ideas that I was hard to use just one with out it seeming like it was too simple and I didn't spend a lot of time on it. I have never made a poster before so it was a bit challenging. I first did research figuring out which propaganda issue would be best to choose from. After a long time of research, I found a poster that would work. I then started to sketch different ways I could approach this poster. I had too many ideas and came up with this idea before it was too late. I used Photoshop to create the poster and went to the Millrace lab 1 to print my 24' x 36' poster.
Sunday, December 6, 2009
Final Propaganda Poster
I choose to do a propaganda poster on World War II. The poster is about people talking, giving away or letting important information slip from their mouths and then the enemies will hear and bad things will occur. I choose lips and the blowing wind was suppose to be the talking then lead the ship to shipwreck against the rocks. I think I spent too much time and should have kept it more simple. I had so many ideas that I was hard to use just one with out it seeming like it was too simple and I didn't spend a lot of time on it. I have never made a poster before so it was a bit challenging. I first did research figuring out which propaganda issue would be best to choose from. After a long time of research, I found a poster that would work. I then started to sketch different ways I could approach this poster. I had too many ideas and came up with this idea before it was too late. I used Photoshop to create the poster and went to the Millrace lab 1 to print my 24' x 36' poster.
Friday, December 4, 2009
Propaganda Poster
The assignment is to pick a propaganda subject from 1900-1950, from any country, and remake a modern looking poster about it. You can appropriate styles and themes, but it should look modern. As well, the size should be 24x36.
I think I am heading towards the issue women's rights and joining the service. "Gee i wish i was a man..." (1918) "We can do it" "Women every thursday" "For your country's sake today..." (1940's) Going with one of those posters and using the style but making it modern. I wanted to come up with my own catchy phrase like they did on each poster. I like the idea of a navy girl.
Monday, November 23, 2009
Poster Ideas
In our group the next project is to make a poster the topic is propaganda. But in our group we have to figure out something that we all agree on and then make a poster going against that idea. At the end we were going to have the class discuss what they see. Depending on how the class discusses each of our 5 posters then that is who the winner will be. Here are some of the ideas I came up with:
Anti electric cars
For nuclear power
Sarah Palen for president
For cloning / stem cell research
Earth is flat
Against stop lights
Right to bare arms
Against men and mini kilts
Cost of sin is death
Against body art
Against abstinence
PDA
No toilet paper (badets)
No vegetarians
Plants feel pain
Final Table


The table is now really heavy with all of the weight I put inside of it. Its sturdy doesn't wobble around. I just have to make sure that not a lot of weight it put in the middle because there is only the bottom 1/8 thick holding all this weight on top of it. It could fall through. It turned out really nice and I am happy with my results.
I routed 3/4 of inch to take out the center. Since the center of it was all cardboard i had to build up so that the tile would sit evenly across. I added extra wood and glued it in the middle. Then I put down the first layer that would set the tiles on. I used 1/8 inch spacers to space the tiles evenly. Then I mixed up the gout and used a sponge to wipe away the extra.
Day 3: Table


When I was done with the first layer I took of the tape that was "protecting the 3/4' inset. When I pulled off the tape the finish came off with it. so i scraped around that edge to make it took more older to match the tiles.
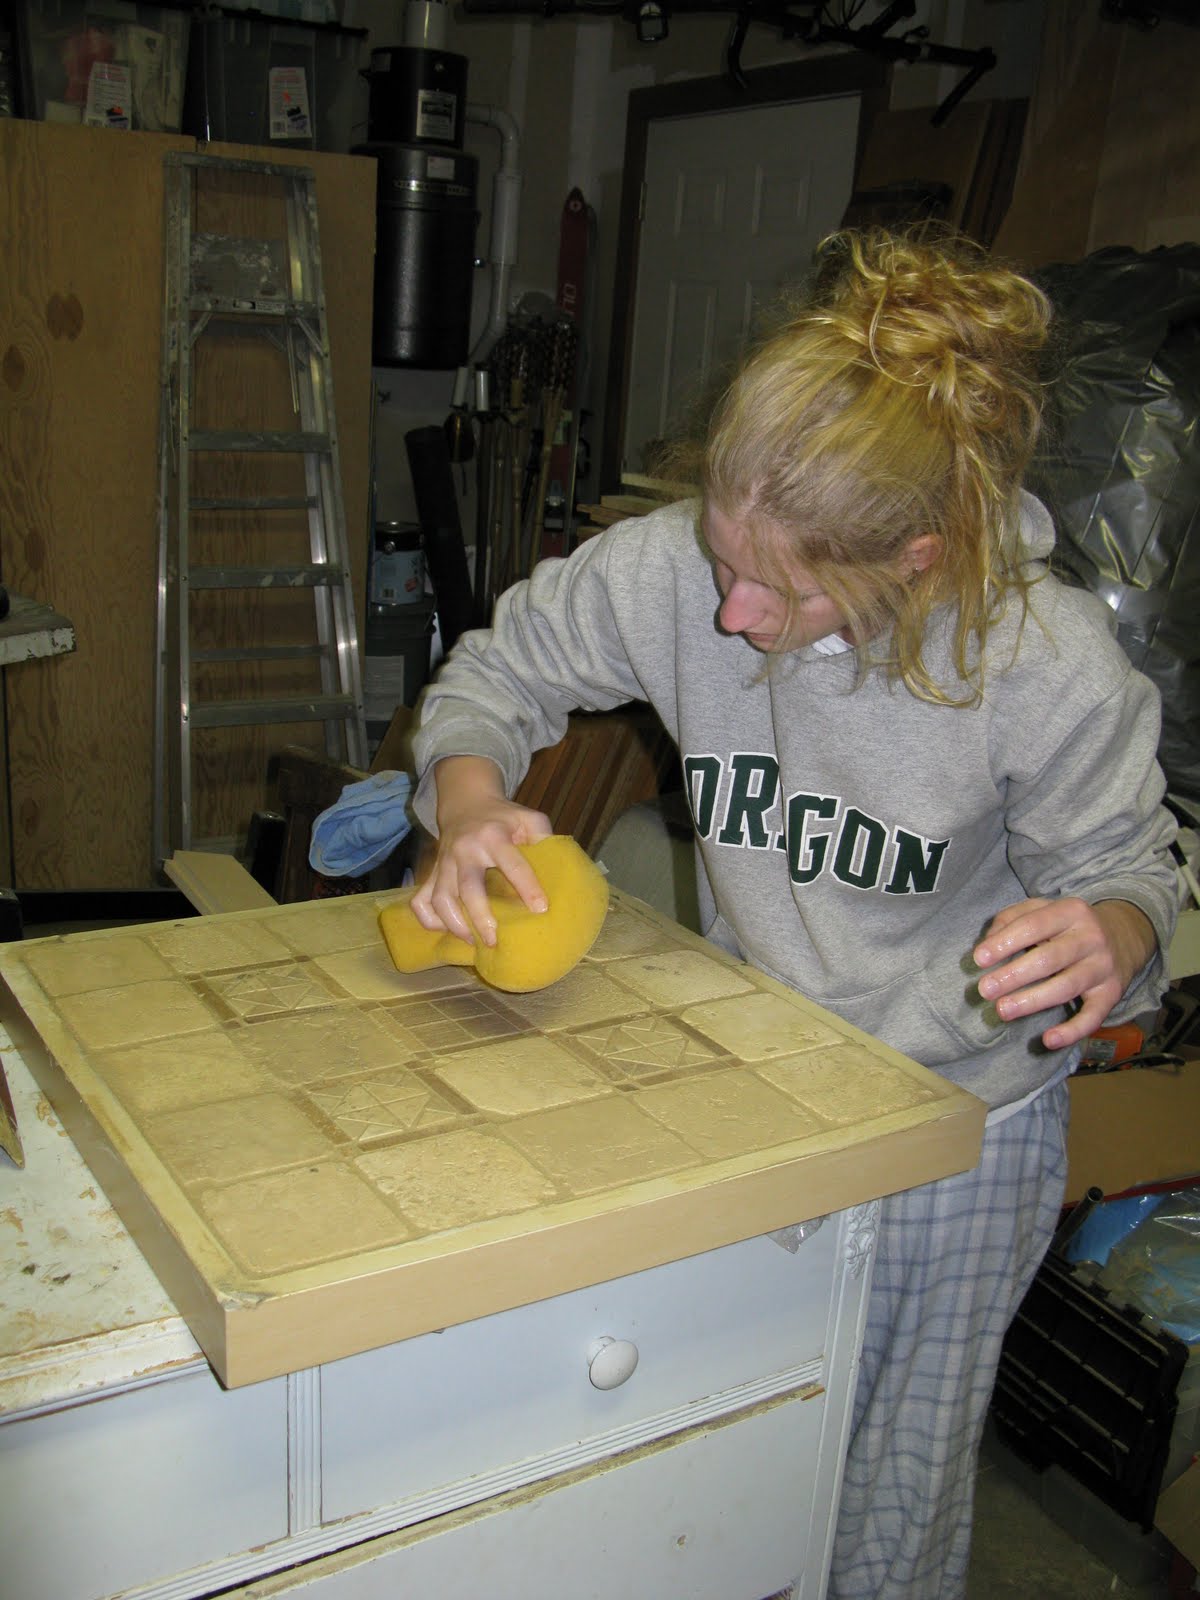
I mixed the grout into a bucket, then smeared all the grout in between the tiles. I used a sponge to wipe away the extra grout that was on the tiles. The sponge was so i would wipe evenly across the tiles so that I wouldn't push the tiles down or uneven the surface. When I was done putting the grout on I put the legs on. It took a day for the grout to dry fully. And I am done.
Table cont. day 2
Day two, I had to mix the first layer of slip to lay in the middle of the table so that it would rise up and the tiles would be flesh with the top of the table.

 I used this rake sort of thing to smooth the first layer around.
 I started laying down the tile. Each tile had to be 1/8' apart slightly. I was a little off by measurements just because the table and the titles were slightly off. I used at first these little 1/8' crosses to put in between each tile as I laid them down.
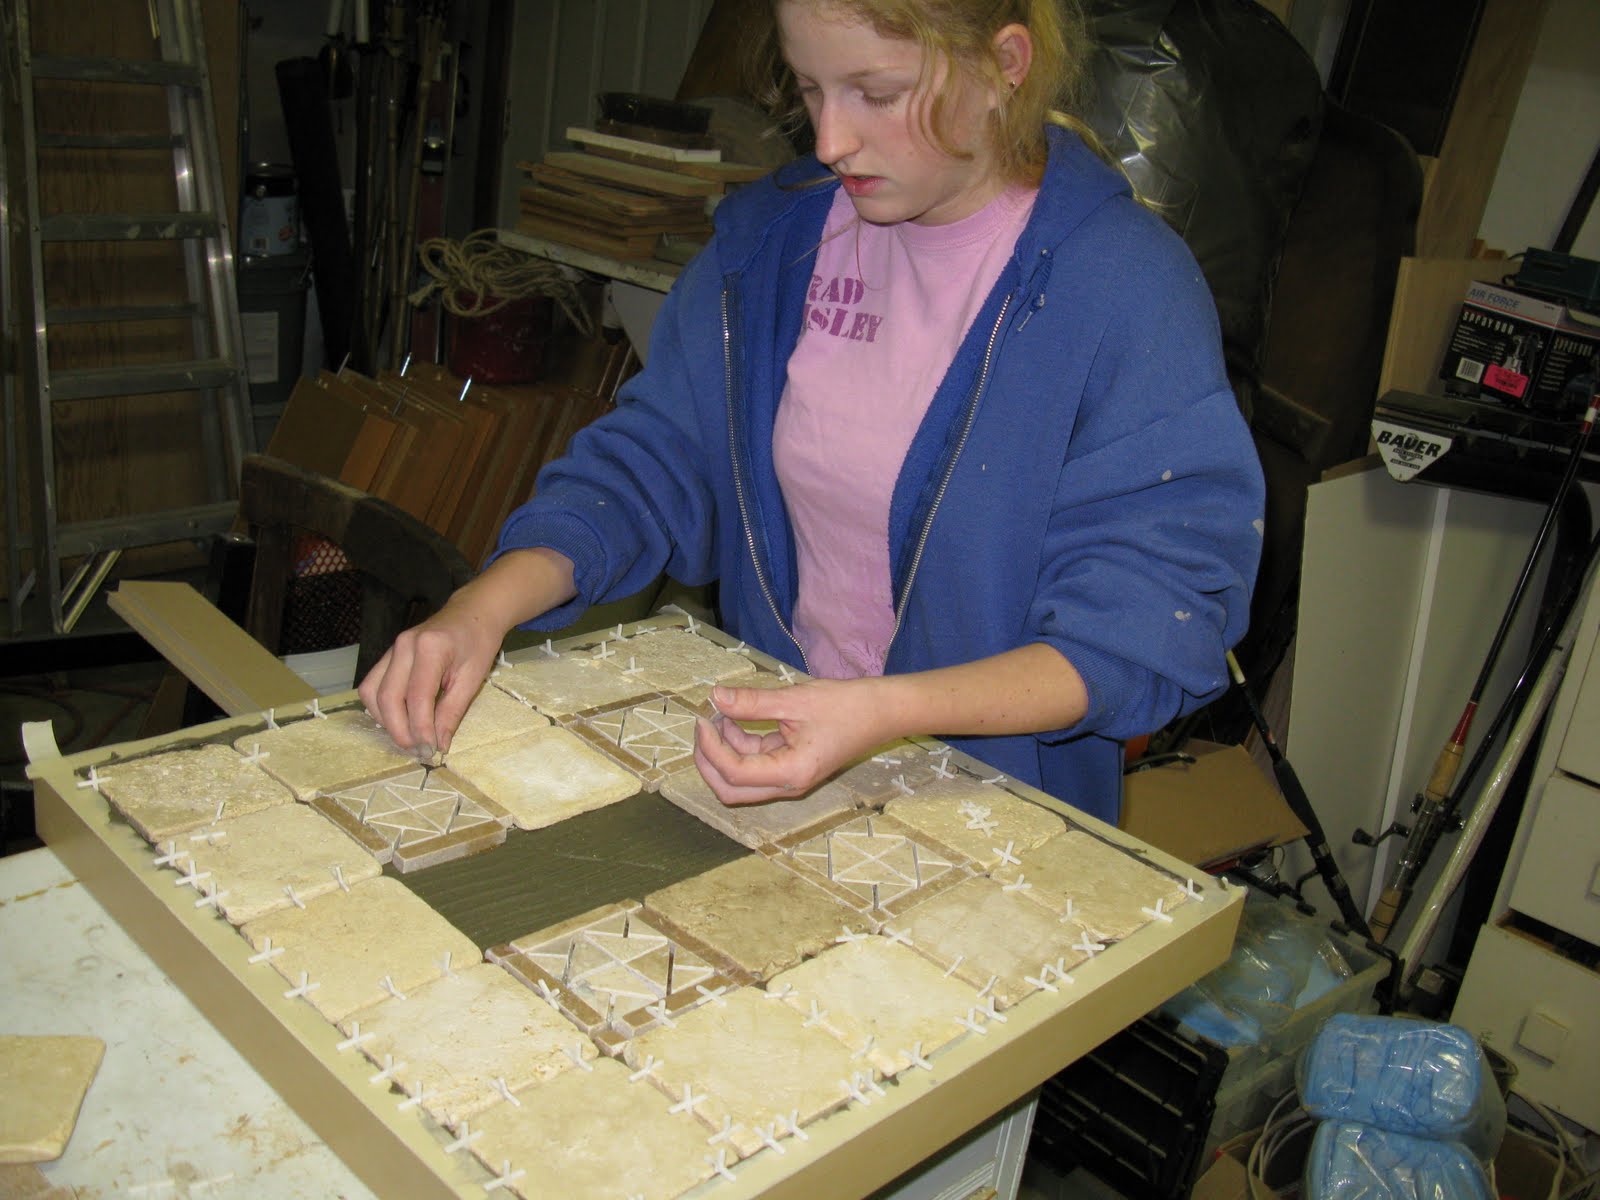
This is putting the second to last piece on. After I was done doing that I had to wait until it was dry which took till the next day.
Compition: table
 Day one, Dad found some tile that was laying around from the shower they redid. I placed the left over pieces on my table to see if I had enough. There was, so my dad help me come up with a way on the router to make a straight edge that inset the table an 3/4'.
 Then after I routed out all the way around the table, I ripped off the middle chunk.
 With the extra long pieces I had to break into tiny squares.


 The the order of the pictures centered above, when i took off the center of the table there was coiled cardboard inside which made it hollow followed by the next picture. In order for the tiles to be place I needed to glue down board to rise the inside. I glue three layers of wood down. one of which was the top of the table. End of day one.
Subscribe to:
Posts (Atom)